Have you ever opened a pouch of coffee or dried item only to find it stale within days, even though it looked perfectly sealed? In most cases, the real issue lies in how the seal was made, not in the pouch itself. So that’s why for beginners or experts to know the real quick answer to How To Seal Kraft Stand Up Pouches is important, as it causes leakage and spoilage within days. Good sealing practice results in leak prevention and forming a proper airtight seal on every pouch. Scroll down for a complete, step-by-step breakdown of how to achieve proper sealing every single time.
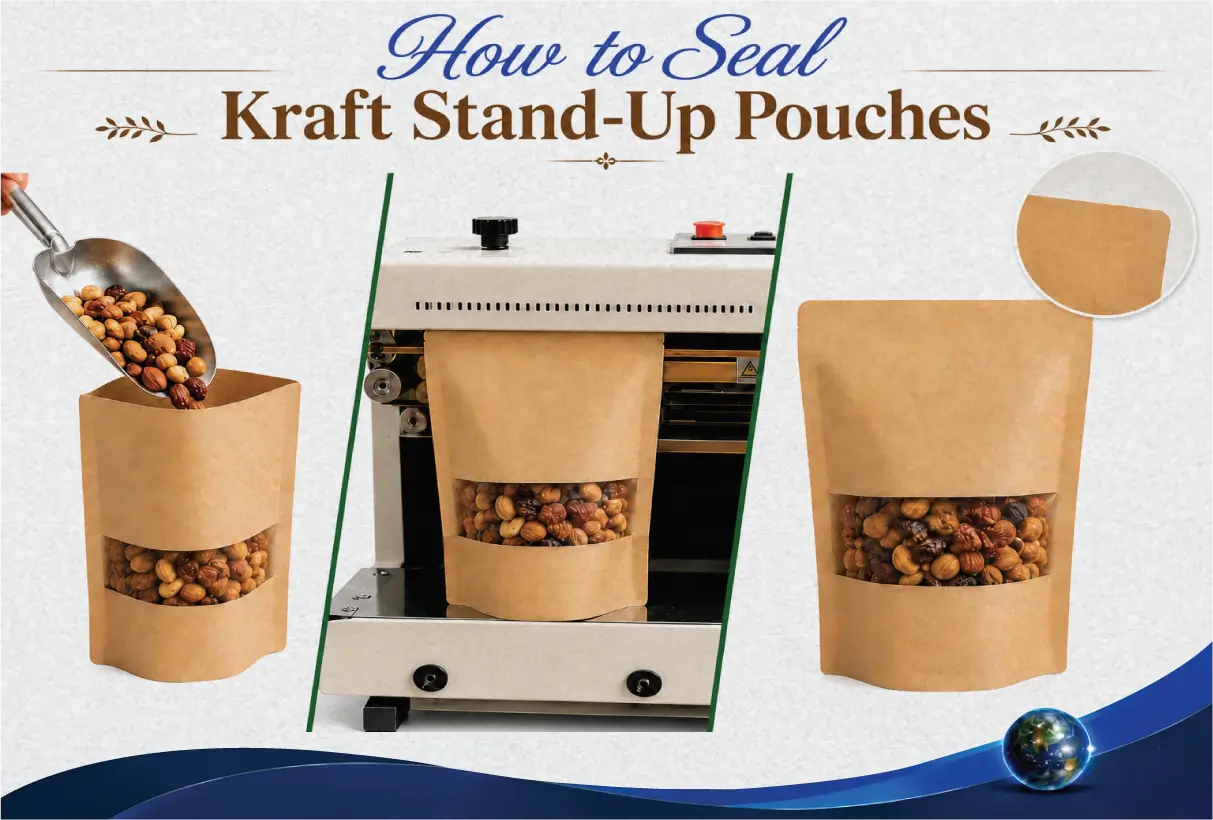
Understanding Your Kraft Stand-Up Pouches
Before learning how to seal kraft stand up pouches properly, it is important to complete a few basic preparation steps. The process begins with selecting the right pouch type, as not every kraft pouch is suitable for heat sealing. When a Customized Stand Up Pouch is being used, its size, inner lining, printed design, and heat-sealable layer should also be checked carefully. In addition, the correct sealing tools, temperature settings, and a clean working surface should be prepared in advance. Proper groundwork helps prevent weak seals, product leakage, wrinkles, and packaging damage during the sealing process. Much of this preparation also depends on the quality of the kraft paper laminate and food-grade inner lining used inside each pouch.
Recycling, packaging, businesses are changing all of those things because that’s what consumers want.” — Jerry Greenfield
Identify the Type of Kraft Pouch
It is important to note before know properly how to seal kraft stand up pouches that plain paper kraft pouches cannot be heat-sealed effectively without an inner heat-sealable lining. For products requiring additional access protection, Child Resistant Mylar Pouches may be selected instead of standard kraft formats, particularly when safe closures and stronger barrier properties are required.
1. Heat-sealable kraft pouch: An inner heat-sealable lining is present, that is required for a proper heat seal to be formed, often making use of a polyethylene (PE) lining as the inner sealing layer.
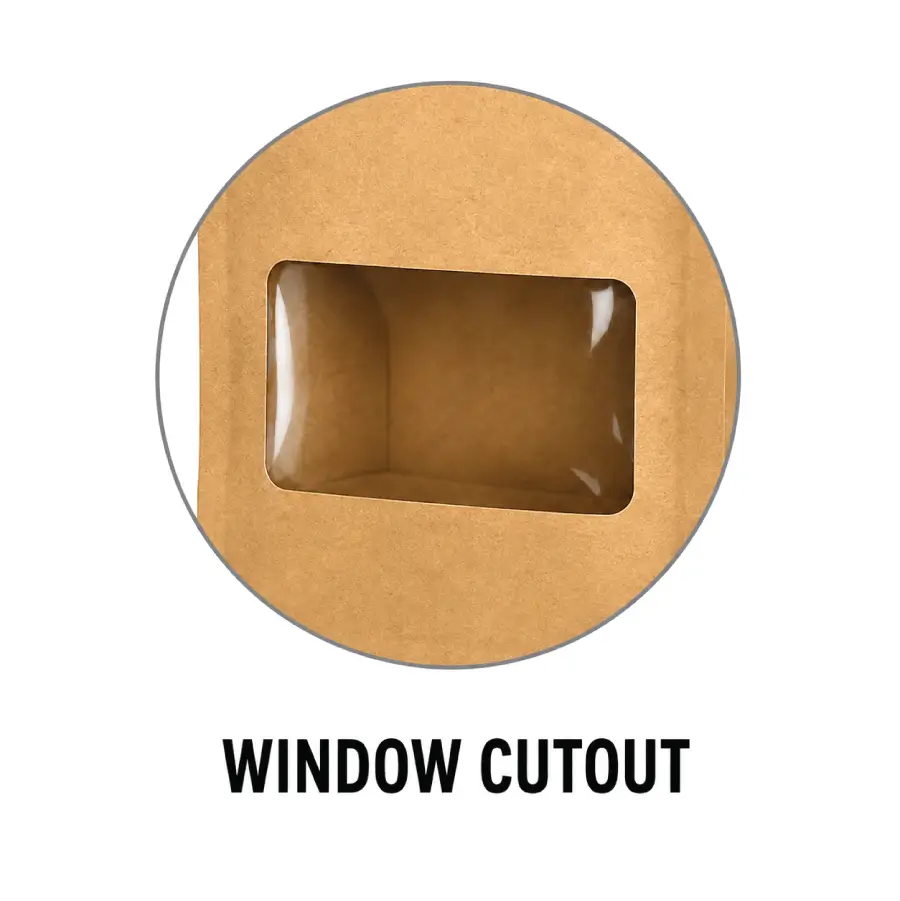
2. Window kraft pouch: A transparent panel is added to the front, through which the visibility of the product is improved without the use of full plastic packaging. When a more distinctive and reflective presentation is required, Holographic Mylar Packaging is often selected. An inner coating is also used by ignoring windows.
3. Valve pouch: A one-way valve is fitted, through which excess air is released, and this type is often used for freshly roasted coffee, sometimes paired with an aluminum foil barrier layer for extended freshness. An inner coating is also used by including valves.
4. Kraft pouch with PE, foil, or inner coating: An additional inner layer is included, through which extra moisture resistance and a longer shelf life are provided, such as a polypropylene (PP) film for added strength and clarity.
It is important to note that plain paper kraft pouches are not heat-sealed on their own, since an inner heat-sealable lining is required for how to seal kraft stand up pouches to be carried out effectively. A matte kraft finish is often preferred at this stage, since it gives a natural, unbleached appearance without added gloss. Need the right pouch for your product? Explore the various Kraft Paper Stand Up Pouch options and choose the suitable size, inner coating, and closure options for your packaging needs bag.
Tools Required:
Once the bag type has been identified, the required materials and equipment are gathered before the sealing process begins. Wherever possible, FSC-certified paper is prioritized for these pouches to support responsible sourcing. Having the right tools ready in advance is another important part of how to seal kraft stand up pouches efficiently. The following items are typically needed to seal kraft stand-up pouches properly:
- An impulse heat sealer: A compact sealing tool is used for smaller batches, through which a clean, consistent seal is formed on each pouch.
- Product filling tools: Scoops, funnels, or automated fillers are used to transfer the product into the pouch in equal amount, through which spillage and mess are reduced.
“Recycling, packaging, businesses are changing all of those things because that’s what consumers want.” — Jerry Greenfield
Best Ways To Prepare Packaging Before Sealing
Before any pouch is filled or sealed, a few important preparation steps are followed carefully. This stage plays a major role in the final result, as proper preparation helps prevent contamination, weak seals, leakage, and damage during the process of sealing kraft stand-up pouches. This preparation stage forms the foundation of how to seal kraft stand up pouches successfully every time.
Choose the Correct Size of the Pouch
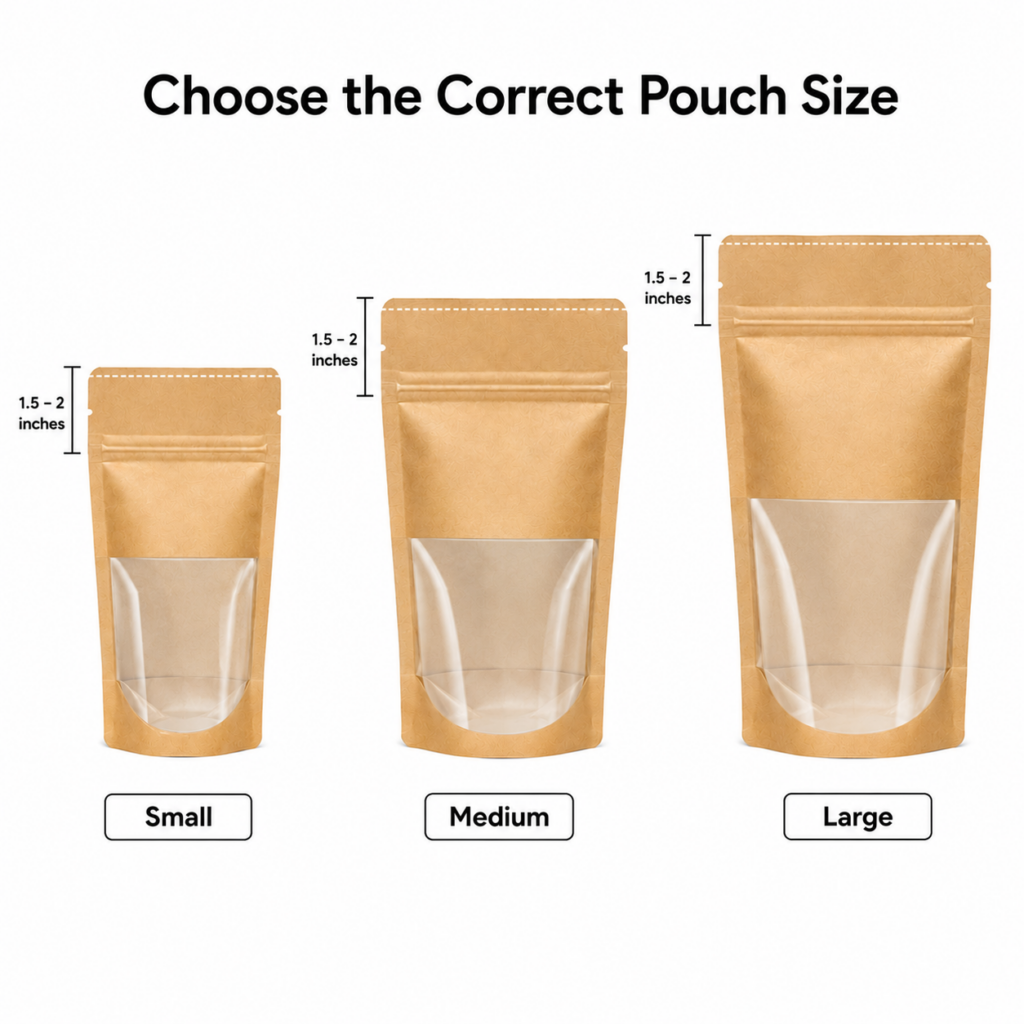
The size is selected according to the quantity of the product being packed. At the top of the pouch, approximately 1.5 to 2 inches of space is left, since this space is needed later for sealing. This step is treated as a small but important part of how to seal kraft stand up pouches. In Gusset Bag Packaging, correct sizing is especially important because the bottom gusset must expand evenly to support the product and help the pouch remain stable after filling.
Prepare the Product
Before placing the product inside the pouch, make sure it is clean, completely dry, free from extra moisture, and stored at the right temperature. Hot food should not be sealed directly in a kraft pouch unless the pouch is specially made for hot filling. Wherever direct food contact is involved, a BPA-free lining is preferred for the inner surface of the pouch. Making sure the product is properly prepared is a key part of how to seal kraft stand up pouches without contamination.
Keep the Sealing Area Clean
Before sealing begins, powder, oil, crumbs, coffee particles, spices, and other product residue are removed from the upper sealing area. When this area is left contaminated, a weak or incomplete seal is often the result. Special attention is given to the top seal area specifically, since this is where most contamination-related sealing failures occur. A clean sealing area plays a direct role in how to seal kraft stand up pouches without weak spots.
Looking for reliable packaging for your products? Explore Where To Buy Kraft Paper Stand Up Pouches from trusted suppliers and choose the right size, lining, and sealing features for your packaging needs.
Important Tips For Filling Kraft Pouches
Once the preparation stage is complete, attention shifts to filling the kraft stand-up pouch correctly, which is another impotant part of how to seal kraft stand up pouches the right way. Careful filling is essential because the amount and placement of the product directly affect the pouch’s stability, appearance, and the strength of the final seal. This stage is especially important for snack packaging and granola packaging, where uneven filling can affect both appearance and seal strength.
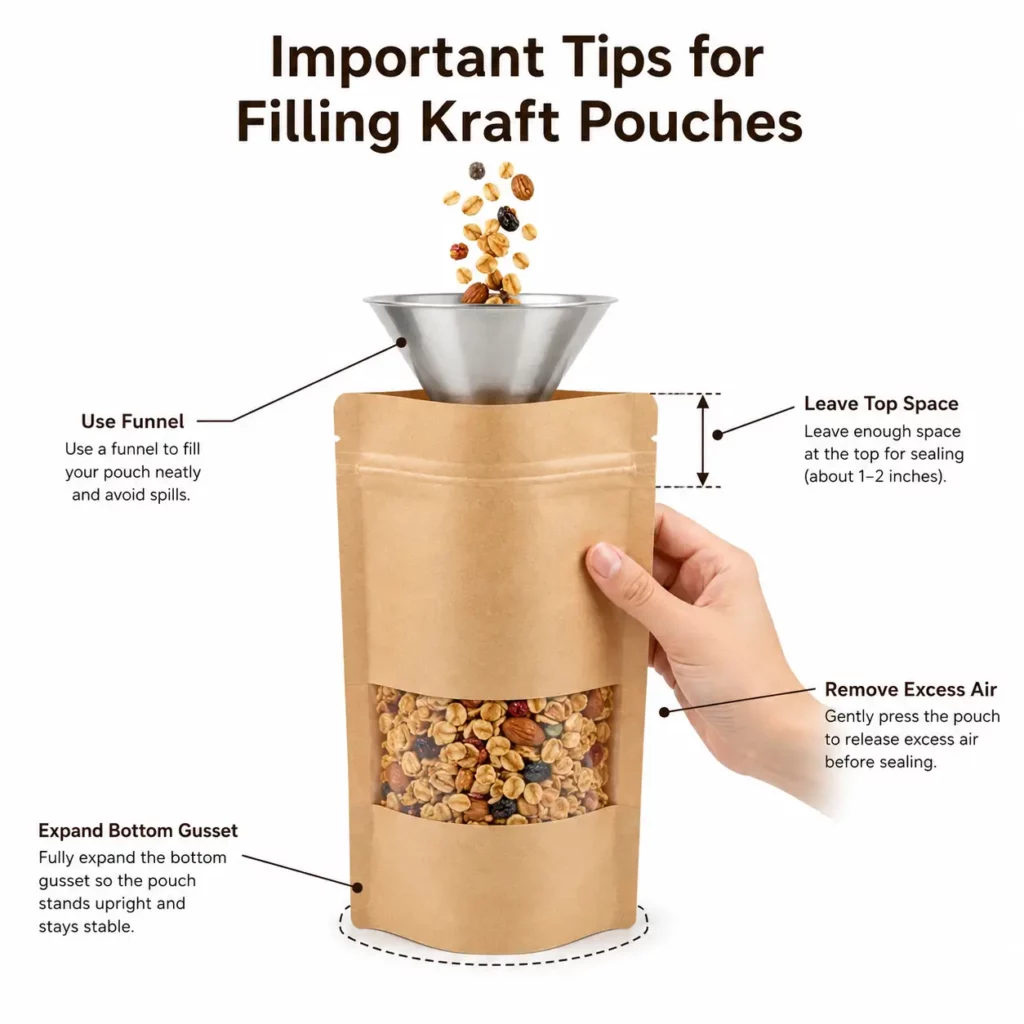
- Fill the Amount in Average Amount: Avoid overfilling the pouch. Expand the bottom gusset properly and distribute the product evenly so the pouch remains stable and upright during filling and sealing. This is particularly relevant for dried fruit packaging, where pieces of uneven size can shift the balance of the pouch. Correct filling technique is closely connected to how to seal kraft stand up pouches evenly.
- Remove Excess Air: Gently press the pouch after filling to remove extra air. Only use vacuum packaging when the pouch is specifically designed for vacuum sealing. Removing trapped air properly supports how to seal kraft stand up pouches with a tighter, longer-lasting closure.
Proper Sealing Techniques For Kraft Stand-Up Pouches
This is the main stage where how to seal kraft stand up pouches is put into practice and the pouch is sealed properly. Careful attention to the sealing temperature, pressure, position, and timing is essential, as even a small mistake can weaken the seal and affect the pouch’s overall protection, appearance, and durability. This stage requires particular care for spice packaging and powder packaging, since fine particles are more likely to interfere with the seal line.
Set Up the Heat Sealer
The temperature and timer settings on the heat sealer are adjusted according to the inner lining and thickness of the pouch. For coffee packaging in particular, sealer settings are often adjusted slightly to accommodate valve fittings and degassing requirements. Getting the sealer settings right is one of the most important steps in how to seal kraft stand up pouches accurately.
Heat-Seal the Pouch
The top portion of the pouch is placed flat between the sealer’s jaws. Wrinkles and folds are avoided wherever possible. Heat and pressure are applied for the required duration. For tea packaging, extra care is taken around this step, since delicate leaves are more sensitive to excess heat than denser products. This step is where how to seal kraft stand up pouches actually takes physical shape through heat and pressure
Allow the Seal to Cool
Immediately after sealing, the pouch is not pulled or stretched. A few seconds are allowed for the seal to cool, so that the bonded layers are properly set. This cooling time after sealing is not skipped, even under time pressure, since a rushed seal is far more likely to fail later.
Quality Check And Fixes
Even after the kraft stand-up pouch has been sealed, a final inspection is carried out to ensure the seal is secure, consistent, and suitable for storage or transportation. This step helps identify any wrinkles, gaps, weak areas, or other sealing issues before the pouch is approved for use. Patience at this stage makes a real difference in how to seal kraft stand up pouches for a lasting bond.
Check the Seal
Check that the seal is straight, smooth, and fully closed. Make sure there are no wrinkles, burn marks, open gaps, or product residue along the sealing line. Gently pull the seal to confirm that it does not open. These checks help ensure that the kraft stand-up pouch has been sealed correctly. At this stage, label placement is also reviewed to confirm that printed information remains fully visible and undamaged. A thorough final check confirms that how to seal kraft stand up pouches has been done to the right standard.
EXTRA INFO:
Recommended Seal Width
For kraft stand-up pouches, a seal width of 5 mm or wider is generally preferred. For heavy products and thicker laminated pouches, an even wider seal is recommended. For a fully compostable kraft pouch, seal width is kept consistent with these recommendations to avoid compromising its natural breakdown properties. Seal width also plays an important role in how to seal kraft stand up pouches for heavier or bulkier products.
Common Sealing Mistakes in Kraft Stand up Pouches
Several common mistakes can reduce the strength and reliability of a kraft pouch seal. These include using a plain paper pouch without a heat-sealable inner lining, overfilling the pouch, or failing to clean the sealing area properly. Applying excessive or insufficient heat may also cause weak, damaged, or incomplete seals. The top edge of the pouch should remain flat and wrinkle-free before sealing. Avoiding these common errors is important to how to seal kraft stand up pouches correctly every single time.
Ready to upgrade your packaging? Visit Canadian Custom Packaging to explore custom solutions, or contact us today for expert guidance and a personalized quote.
Conclusion
Every important step involved in how to seal kraft stand up pouches has been covered in this blog, in a slightly different style at each stage, from pouch selection and preparation to filling, sealing, quality checks, and final labelling. It has become clear that a reliable seal is not achieved by chance; it is achieved through careful preparation, correct equipment settings, and consistent quality checks at every stage. When these steps are followed closely, freshness is preserved, leakage is prevented, and the shelf life of the product is extended significantly. Beyond function, these steps also support branded packaging efforts, helping with product differentiation and shelf appeal wherever the pouch is displayed.
Frequently Asked Questions (FAQs)
Are all kraft stand-up pouches suitable for heat sealing?
No, plain paper pouches without an inner heat-sealable lining are not suitable for heat sealing. This is why understanding the lining type is a key first step in how to seal kraft stand up pouches correctly.
What temperature is required to seal kraft pouches?
An impulse heat sealer is generally recommended for small batches, while a continuous band sealer is preferred for bulk production. Choosing the right sealer type makes a real difference in how to seal kraft stand up pouches at any production scale.
How much space should be left at the top of the pouch?
Approximately 1.5 to 2 inches of empty space is left at the top for sealing purposes.
What type of heat sealer is best for kraft pouches?
An impulse heat sealer is generally recommended for small batches, while a continuous band sealer is preferred for bulk production.
How is it checked whether a pouch is airtight?
A gentle pull test is performed on the seal, and the pouch is inspected for gaps, wrinkles, or burn marks.
Are kraft pouches suitable for vacuum sealing?
Yes, but only pouches those bags that are specifically designed for vacuum sealing are used for this purpose.
Why does a seal keep opening after it’s applied?
In most cases, this is caused by insufficient heat, a contaminated sealing area, or a seal that was tested before it cooled. These are among the most common issues found when how to seal kraft stand up pouches is not followed carefully.
Are kraft pouches personalized with printing and labelling?
Yes, custom printed designs, adhesive labels, batch coding, and expiry date printing are commonly added according to the requirements of the brand.